3-Compartment Sink: Rules, Order, and Steps
2025-07-04
- The first compartment uses warm soapy water (110°F–120°F) to thoroughly wash dishes and remove food residue.
- The second compartment uses clean water to rinse off all detergent.
- The third compartment uses sanitizing solution at the proper concentration (such as a 50–100ppm chlorine solution) or hot water (≥171°F) for sanitization.
What is a 3-Compartment Sink
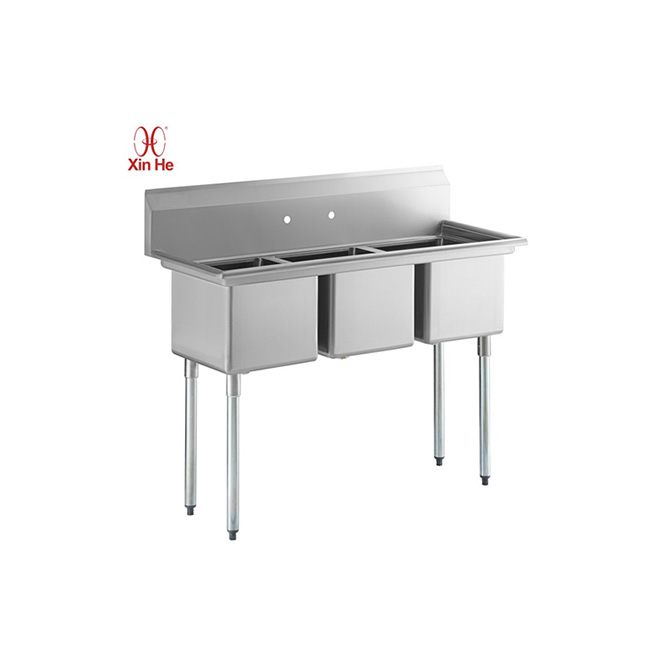
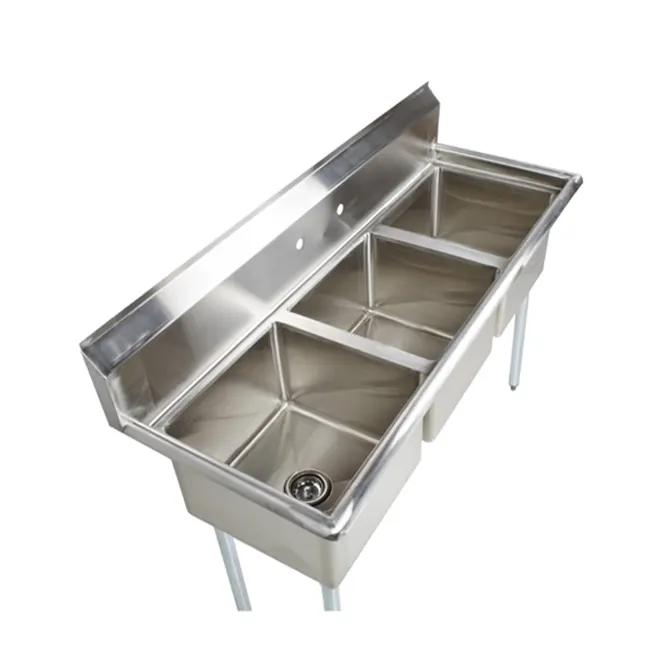
A three compartment sink is a manual dishwashing station split into three separate basins side by side. This setup isn’t just random layout design; it is a practical tool designed around a scientifically validated sanitation process.
The Basic Structure
- First compartment (Wash area): For scrubbing away grease, surface dirt, and visible food particles.
- Second compartment (Rinse area): For washing away remaining soap and film.
- Third compartment (Sanitizing area): For soaking dishes to kill off invisible bacteria and pathogens.
Most of these setups are built out of commercial stainless steel because the material doesn’t rust, warp, or wear down easily in a wet, busy kitchen. The smooth metal surface prevents grime from getting trapped in small cracks, which keeps maintenance simple and keeps the kitchen up to professional standards.
This three-stage design protects your guests by stopping cross-contamination and lowering the risk of foodborne bacteria spreading through clean silverware.
Regulatory Requirements for 3-Compartment Sinks
Commercial kitchens in the United States must follow strict guidelines across multiple legal levels to pass inspection:
FDA Food Code Requirements
The FDA Food Code mandates that all hand-washed plates, glasses, and kitchen tools undergo three specific stages: washing, rinsing, and sanitizing. The core rules are clear:
- The wash basin water cannot drop below 110°F (43.3°C).
- The chemical sanitizing levels or hot water temperatures in the final basin must stay at exact legal strengths.
- All items must air-dry naturally on a rack. Drying dishes with a towel is a direct code violation.
State and Local Health Regulations
Local inspectors often add extra rules on top of the federal baseline. It is common for local health codes to require:
- Written logs tracking daily chemical sanitizer concentrations.
- Strict, posted step-by-step instruction signs right above the sink basins.
- Higher minimum water temperatures based on local plumbing guidelines.
During a routine health department visit, inspectors will check your sink setup first. Failing to meet these standards can lead to immediate point deductions, heavy fines, or temporary operational shutdowns.
Correct Washing Sequence
You must work down the line in order—usually from left to right, depending on how your plumbing is installed. Skipping a basin destroys the chemistry of the whole system.
1. First Compartment: Wash Area
- Fill the basin with hot water between 110°F and 120°F (43.3°C to 48.9°C).
- Mix in commercial dish soap until you have a thick, soapy mixture.
- Scrub every item thoroughly with a clean brush or heavy-duty pad.
- Scrape off every bit of stuck-on grease and food scraps.
Why it matters: Sanitizers cannot penetrate heavy grease or food film. If you leave solid debris on a plate, the chemical bath in step three won’t work, turning your clean water into a breeding ground for bacteria.
2. Second Compartment: Rinse Area
- Fill the basin with clean water kept around 110°F (43.3°C).
- Dunk the soapy dishes completely underwater.
- Wash away every trace of soap bubbles and film before lifting them out.
Why it matters: Leftover soap bubbles carry dirt back onto the dish. Even worse, dish soap is alkaline; if you carry it over into the third basin, it alters the pH level and neutralizes your chemical sanitizer.
3. Third Compartment: Sanitizing Area
You can sanitize your kitchen tools using one of two approved methods:
Method A: Hot water sanitation
- The water temperature must stay at or above 171°F (77.2°C).
- Keep the items completely submerged for at least 30 seconds.
Method B: Chemical sanitation
- Mix an approved commercial chemical (like chlorine bleach) into the water.
- Follow the packaging instructions exactly to reach the right chemical ratio.
- Let the dishes sit underwater for the required time (usually 1 to 2 minutes).
Why it matters: This step is your final line of defense against food poisoning. It kills the microscopic organisms that regular soap and scrubbing leave behind.

Detailed Step-by-Step Guide
Preparation
- Drain all three basins completely and scrub out the empty sinks.
- Gather your cleaning gear: dish soap, approved sanitizer, chemical test strips, a reliable thermometer, fresh scrub pads, and a timer.
- Check that the floor drains and overflows are clear.
- Scrape all large food scraps and leftovers directly into the trash before wetting the plates.
Water Temperature and Sanitizer Guidelines
| Basin | Target Temperature | Chemical / Soap Concentration |
|---|---|---|
| 1. Wash | 110°F–120°F (43.3°C–48.9°C) | Follow label directions (usually 1 oz per gallon) |
| 2. Rinse | ~110°F (43.3°C) | Pure, clean water (change out as soon as it gets cloudy) |
| 3. Sanitize (Hot Water) | Above 171°F (77.2°C) | No chemicals required |
| 3. Sanitize (Chlorine) | 75°F–120°F (24°C–49°C) | 50–100 ppm |
| 3. Sanitize (Iodine) | 75°F–120°F (24°C–49°C) | 12.5–25 ppm |
| 3. Sanitize (Quat Ammo) | Follow manufacturer guidelines | Usually 200–400 ppm |
Minimum Soaking Times
1.Hot water soak:Minimum 30 seconds.
Keep dishes completely underwater at 171°F or higher. Use a rack or basket to avoid burning your hands.
2.Chlorine bleach solution:Minimum 7 to 10 seconds.
Soak for at least 7 seconds for a 50 ppm mix, or 10 seconds if the mixture sits between 50 and 100 ppm.
3.Iodine solution:Minimum 30 seconds.
Submerge the items entirely in a balanced 12.5–25 ppm bath.
4.Quaternary ammonium (Quat):Minimum 30 seconds.
Keep items under the surface for a minimum of 30 seconds, or follow the specific timestamp on the bottle.
The Drying Process
Set the sanitized kitchenware onto clean stainless steel drainboards to air-dry naturally. Never use a cloth or towel to dry them. Kitchen towels trap moisture and spread bacteria from one plate to the next, which instantly ruins the sanitation process. Because stainless steel drainboards resist chemical corrosion, they can handle constant contact with heavy sanitizers without breaking down.
Common Errors and Quick Fixes
The Danger of Rushing the Job
When the kitchen gets busy, workers often try to speed things up by skipping the middle rinse basin or pulling dishes out of the sanitizer too quickly. This shortcut causes serious problems:
- Leftover dish soap weakens the chemical sanitizer, making the final soak useless.
- Bacteria survive the short soak and grow quickly inside stackable storage bins.
- The risk of serving contaminated food increases, which can cause food poisoning outbreaks.
The Fix: Write out clear, basic operational rules, train every kitchen team member, and run quick spot-checks during busy shifts.
Missing the Mark on Temperature and Chemical Mix
If your water temperatures or chemical ratios are off, the entire wash cycle fails:
- Cold water: Leaves heavy grease stuck to the plates and stops sanitizers from working.
- Boiling wash water: Bakes proteins and egg residues directly onto the dish surface, making them harder to scrub off.
- Weak chemical mix: Fails to kill off dangerous germs.
- Strong chemical mix: Leaves chemical film on plates, which can make customers sick.
The Fix: Keep a working thermometer and a fresh container of chemical test strips right by the sink so workers can check the water every time they refill the basins.
Accidental Cross-Contamination
Poor habits can spread bacteria back onto items you just cleaned:
- Leaving dark, greasy water in the wash basin without replacing it.
- Mixing raw meat prep knives with cooked food serving tongs in the same basin.
- Stacking freshly sanitized bowls on an unwashed counter or dirty drainboard.
The Fix: Empty and refill the basins as soon as the water looks cloudy or greasy. Wash raw prep tools in separate batches, and clean the clean-side drainboards throughout the day.
Training, Supervision, And Paperwork
Employee Training Checklist
Every new line cook and dishwasher needs to master these core skills before working unsupervised:
- The basic science behind why we wash, rinse, and sanitize in order.
- How to read a kitchen thermometer and use chemical test strips correctly.
- How to handle and mix commercial sanitizing concentrates safely.
- How to spot and fix a dirty basin or a weak chemical mixture.
New kitchen employees should complete the full three-step wash process at least three times under direct supervision before cleaning dishes on their own.
Building a Supervisor System
- Assign an experienced team member or kitchen shift leader to oversee the dish station.
- Hang a simple daily checklist right next to the plumbing fixtures.
- Run unannounced spot-checks on the water conditions during peak service hours.
- Correct poor cleaning habits immediately before they turn into permanent routines.
Required Kitchen Logs
Keeping accurate logs proves to the health department that your kitchen prioritizes food safety. Make sure your team tracks:
- Daily temperature and chemical concentration readings for each shift.
- Signed training sheets for every member of your kitchen crew.
- Equipment inspection notes and thermometer calibration dates.
- A written record of any health code issues along with notes on how you fixed them.
FAQ
1. What if my kitchen space doesn’t have a 3-compartment sink
If you run a small bakery or a mobile food truck with limited space, you can look into alternative options:
- Compact, self-contained portable 3-compartment sinks with built-in water tanks.
- A single small utility sink paired with a commercial sanitizing dishwasher.
- A standalone commercial dishwasher built to run high-heat sanitation cycles.
No matter which option you choose for your space, your cleaning workflow must still wash, rinse, and sanitize every tool to pass inspection.
2. Commercial Dishwasher vs. 3 Compartment Sink
A balanced commercial kitchen often uses both options together to handle different cleaning jobs.
| Feature | Commercial Dishwasher | 3-Compartment Sink |
|---|---|---|
| Speed & Volume | High speed; handles large stacks of standard plates quickly. | Manual speed; depends on how fast the worker can scrub. |
| Sanitation Quality | Highly consistent; runs on automatic temperature timers. | Relies on the operator checking chemical mixes manually. |
| Upfront Costs | High initial purchase price, plumbing installation, and repair costs. | Lower upfront cost; simple plumbing installation. |
| Versatility | Restricted by rack size; cannot fit giant prep pots or odd shapes. | Open basins; easily fits large sheet pans and mixer bowls. |
| Maintenance | Complex mechanical parts that require professional repair. | Simple stainless steel construction; rarely breaks down. |
3. Which chemical sanitizer should I choose
- Chlorine bleach: Affordable and kills a wide range of bacteria quickly, but it has a strong chemical smell and can corrode metal basins over time if mixed too strong.
- Iodine solutions: Gentle on hands and works well across different water conditions, but it can stain light plastic plates and costs more than bleach.
- Quaternary Ammonium (Quat): Odorless, non-corrosive to stainless steel basins, and stays active in warm water, but it doesn’t kill certain types of bacteria as effectively as chlorine.
When picking your chemicals, consider your kitchen budget, the types of dishes you use, and your local water conditions. Always follow the mixing instructions on the back of the bottle.